Tag Archives: tomato

Fresh Spinach Tomato Garlic Tortellini Soup

I pinned this recipe originally as a Slow Cooker. Turns out it’s just a 30 minute meal on the stove. I’ve been hoarding tomatoes for awhile. Recipe calls for 2? Oh I’ll buy 3… Suddenly I have 4 tomatoes and no idea what to do with them. A few nights of negative temperatures and suddenly nothing sounds better than soup.

I had to make a few adjustments to this recipe. Turns out I didn’t have everything I needed, but I already started so there was no going back. I’ve included my changes and comments in Bold. 

Original Recipe:

Prep Time: 20 minutes

Cook Time: 20 minutes

Yield: About 6 servings

 Ingredients
  • 1 3/4 lb Roma tomatoes (about 9 medium) (I had 4 roma tomatoes, so I threw in one can of garlic roma tomatoes to offset buying more)
  • 1 1/2 Tbsp extra virgin olive oil
  • 1 yellow onion finely chopped (1 1/2 cups) (I guestimated. I think I only added about 1/2 cup)
  • 6 cloves garlic, minced (more or less to taste)
  • 2 quarts (8 cups) low-sodium chicken broth (I only had 1 quart so I added an extra cup of water and used half a cup of Cream of Chicken Soup. Really not sure that is a great substitution.)
  • 2 cups water
  • 1 (20 oz) package refrigerated three cheese tortellini
  • Salt and freshly ground black pepper, to taste
  • 1 tsp granulated sugar (Didn’t have any, so didn’t add it” 
  • 6 – 9 oz fresh spinach, chopped
  • 3 Tbsp chopped fresh basil (My basil plant is dying, so I only had 2 fresh leaves and had to use dried basil instead) 
  • 1/2 cup finely shredded Parmesan cheese, for serving (I had fresh mozzarella instead) 

Directions:

  • Heat a pot of water to a boil and fill a medium mixing bowl with ice water. Once water in pot boils, carefully drop tomatoes into water and boil until skins burst, about 3 – 4 minutes (if a few of them are having trouble bursting, you can remove them from the water and cut an “X” in the bottom of the tomato then return to water for about another minute until skins slightly pull alway). Remove from boiling water and transfer to ice bath, cool slightly then peel, seed and dice into bite size pieces, set aside. ( I overcooked my tomatoes. Once they burst they are done. I cooked them a few extra minutes so they were all mushy)
  • In a pot, heat olive oil over medium heat, add onion and saute until tender, about 3 minutes. Add garlic and saute 30 seconds longer. Pour in chicken broth and water, then increase temp to moderately high heat and bring to a boil. Once it reaches a boil, add tortellini, season with salt and pepper to tastes and boil 7 minutes (or longer if directed on tortellini package). (Watch out. The tortellini cooks fast)
  • Stir in sugar, tomatoes, spinach and basil and cook until heated through and spinach wilts. Serve warm topped with Parmesan cheese.

*If it’s winter and you’re having a hard time finding good Roma tomatoes, you could sub 2 cans regular/petite diced tomatoes, but during the summer when tomatoes are in their prime I highly highly recommend fresh. They make such a difference. (My diced tomatoes already came with garlic so I adjusted how much I added earlier) 

Recipe Source: Cooking Classy

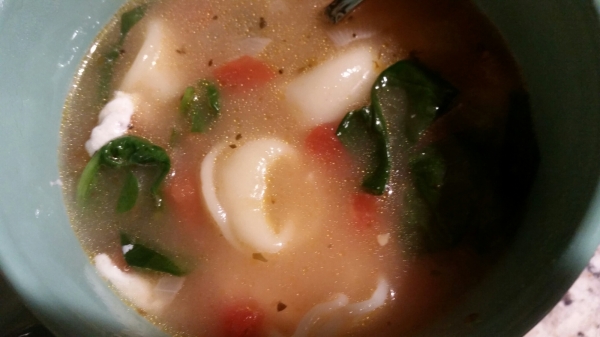
My Result:

image

There was something missing… I can’t blame the recipe because I had to improvise quite a bit. Perhaps it was the lack of sugar, or the lack of fresh basil. I could’t quite put my finger on it.

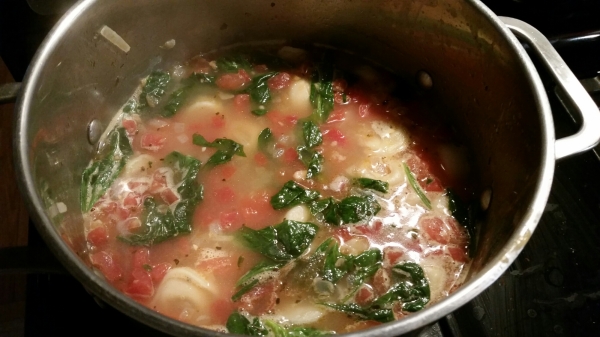
image

The soup we had was what a soup should be. Quite a bit of soup with some tortellini. Overall I wished I had less liquid and more noodles, but this could be from my changes. I also felt the tortellini were really big. I wished I had used a smaller noodle. Does anyone make smaller tortellini? If so, use those. One noodle would take up the entire spoon and leave you with little broth.

image

A few weeks ago my sister made a different, creamier version of a tortellini soup. Honestly, I liked that one a little better. The tortellini worked better with the creamy soup. If I were to make this soup again I might opt for smaller noodles like ditalini or Orzo.

Grade: Cost: Time:
A <$10 <30 Minutes
Level of Difficulty:
Medium
What I Would Change:
Do some prep and make sure you have all the ingredients. Change the pasta to something a little smaller.
Overall Impression:
I think that if I followed this recipe a little closer it might have been a little bit better. My creation was decent in its own right, but there was just something a hint off. Regardless it did a great job warming us up on a freezing cold night.

Creamy Spinach Tomato Tortellini

It was my turn to make dinner on Sunday and I opted for this creamy spinach tomato tortellini. I was tired of the traditional spaghetti and meatballs pasta dinner, and I hadn’t had any tortellini since the time I made spinach and tortellini soup.

Ingredients

  • 1 bag regular sized Barilla three cheese tortellini (8 oz) or 16 oz fresh tortellini in the refrigerated section of your grocery store
  • 2 teaspoon minced garlic
  • 1 cup chopped fresh spinach
  • 1 (14.5 ounce) can petite diced tomatoes
  • 1/2 teaspoon salt
  • 1/4 teaspoon pepper
  • 1 1/2 teaspoons dried basil
  • 1 teaspoon onion flakes
  • 2 tablespoons all-purpose flour
  • 1 1/2 cups half-and-half
  • 1/4 cup grated Parmesan cheese

Instructions

  1. Begin by boiling your tortellini noodles until they are al dente (aka ready). Follow the directions on the bag for boiling time.
    cooking the tortellini
  2. While the tortellini is boiling, chop the spinach roughly.
  3. Heat a large skillet using medium heat and put the two teaspoons of minced garlic into it. Sautee it briefly until fragrant, about thirty seconds or so.
  4. Add into the skillet the petite diced tomatoes (undrained), spinach, salt, pepper, dried basil, and onion flakes.
  5. Cook and stir over medium high heat until the mixture begins to bubble.
    cooking the creamy tomato spinach tortellini
  6. In another bowl, combine the flour and half-and-half. Whisk until fairly smooth.
    Whisking together the half and half and flour
  7. Add the creamy mixture into the the skillet along with the parmesan cheese.
  8. Heat through and reduce the heat to medium low and continue to stir and cook until it thickens, about 5 minutes.
  9. Add the drained tortellini and mix together gently.
  10. Serve and enjoy!

Creamy Spinach Tomato Tortellini

Grade: Cost: Time:
A

< $10

30 min
Level of Difficulty:
Easy/Medium
What I Would Change:
Add a little Parmesan at the end while serving on the individual plates. I only included the 1/4 cup. I would consider upping it to 1/3 cup. Also I would cook it a little longer. I was hungry and rushed it. The tomatoes could have used a few more minutes.
Overall Impression:
Very tasty! We all really enjoyed it. Even the leftovers tasted great!

Portillo’s Chopped Salad CopyCat

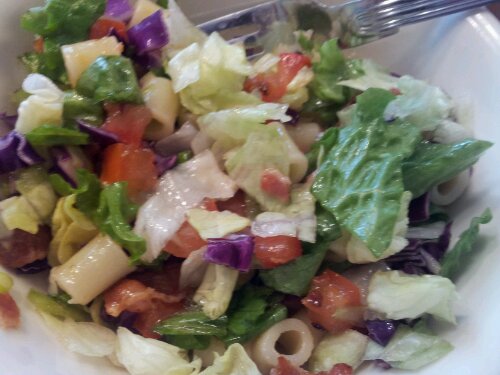
If you’re from the Chicagoland area or have ever driven through Illinios, then you may know of the greatest gift ever given to humanity: Portillo’s Chopped Salad. What makes this salad so special? Unfortunately, it’s something words cannot describe. You just have to try it. So here’s a copycat recipe to try!

image

Even though I pinned multiple recipes for this, I chose this one because it included the recipe for the dressing too. It seems that nobody has the exact dressing recipe, but this one is pretty close.

Ingredients

  • 4 cups cooked Ditalini pasta (I bought Ditali Pasta, they were a little too big after they cooked up and could impact your salad)
  • 1 cup cooked and crumbled bacon
  • 3 cups chopped romaine lettuce
  • 3 cups chopped iceberg lettuce
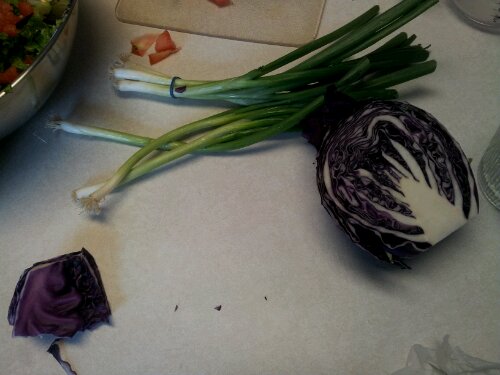
  • 2-1/2 cups chopped red cabbage
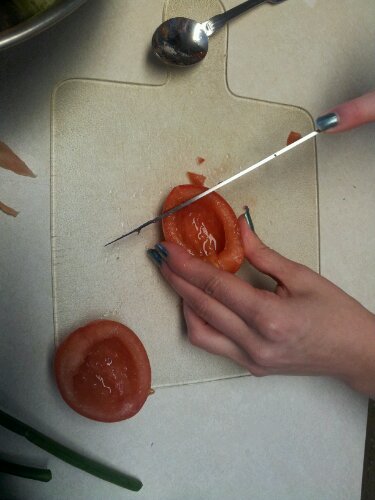
  • 2 fresh tomatoes, seeded and diced
  • 1 cup sliced green onions
  • 4 ounces crumbled gorgonzola cheese (about 1 cup) (I couldn’t find anything that said Gorgonzola, so I used regular Blue Cheese. I think they are the same .)
  • Optional : Diced chicken (They include this in the traditional salad)

image

image

image

Sweet Italian Dressing:
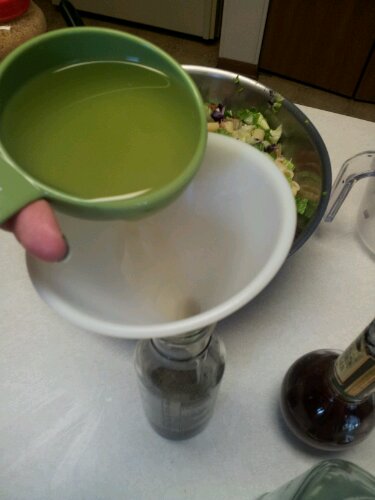
  • 1/4 cup balsamic vinegar
  • 2 cloves garlic, peeled and minced
  • 1 teaspoon sugar
  • 1/2 teaspoon dried oregano
  • 1/4 teaspoon salt
  • 1/4 teaspoon freshly ground black pepper
  • 1/2 cup olive oil

image

Directions:

  • Cook Ditalini pasta according to package instructions. Make sure you salt the pasta water while cooking to give it some flavor. Drain and cool. Set aside.
  • Cook bacon in a skillet until done. Let bacon cool, then crumble it.
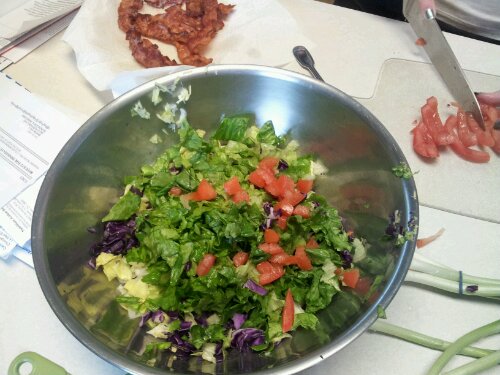
  • Combine romaine, iceberg, red cabbage, tomatoes and green onions in large salad bowl.
  • Add cooled pasta, bacon and gorgonzola cheese to salad.
  • Add dressing to taste right before serving so that it doesn’t get soggy.
  • For the Dressing: Place vinegar, garlic, sugar, oregano, salt and pepper in a blender. While the machine is running, slowly drizzle olive oil through the blender top or feed tube until dressing is combined and emulsified. Store in airtight container in refrigerator for up to two weeks.

Original recipe from: http://www.the-girl-who-ate-everything.com/2013/06/portillos-chopped-salad.html

image

The directions were very simple. This makes a LOT of salad! You’ll be eating salad for days, or could feed an entire family for 4 on this. (maybe even up to 6)
Grade: Cost: Time:

Salad: A+

Dressing: B

~$10-15 (We had a lot.

20 Minutes

Level of Difficulty:
Easy
What I Would Change:
Salad: Add diced chicken. It was strange that the recipe didn’t call for this.Dressing: Be sure you share this right before you add to the salad. Is there a way to make it creamier?
Overall Impression:
Very good. The dressing is not exact, which is what this salad really rides on. It tasted right, but wasn’t as creamy as it should be. I have heard that you can buy bottles directly at the store. If you don’t live in the area, you might be able to buy it online. The actual salad part was great. It should taste equally as good with any italian style dressing.


Tomato Pesto Appetizers

When we were looking for appetizers for this past Thanksgiving, we turned to our good friend Pinterest for suggestions. That’s when I came across these Tomato Pesto Appetizers! Now, I’ve tested Open Faces Basil Empanadas before which were fantastic. This was pretty similar except that it used Pesto instead of the fresh basil.

Recipe: (Courtesy of Tablespoon.com)

Ingredients:

  1. 2 tablespoons basil pesto
  2. 3/4 cup diced seeded tomato  (about 1 large tomato)
  3. 2 tablespoons finely shredded mozzarella cheese
  4. 1 can (7.5 oz) Pillsbury® refrigerated tender layer or buttermilk biscuits   (I used a box of Phillo Shells instead)
  5. 2 tablespoons finely shredded Parmesan cheese

Directions

  1. Heat oven to 375°F. Spray 20 mini muffin cups with cooking spray. In medium bowl, mix pesto, tomato and mozzarella cheese.
  2. Separate dough into 10 biscuits.  Separate each biscuit into 2 rounds. Press 1 round in bottom and up side of each mini muffin cup. Spoon about 2 teaspoons tomato-pesto filling into each cup; press in lightly. Sprinkle with Parmesan cheese.
  3. Bake 8 to 10 minutes or until biscuit edges are golden brown.

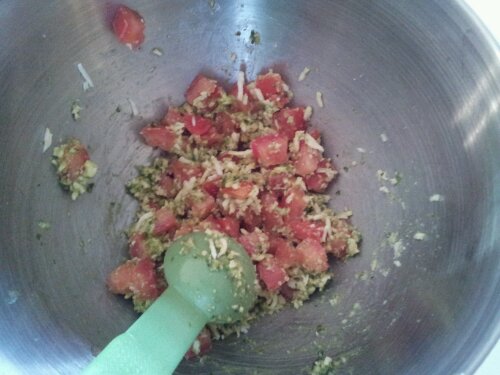
This was really easy to assemble. I mixed together the filling before everyone arrives and put it in the fridge to stay cool. (This doesn’t look like a lot of mix, but remember, it’s going into a biscuit/shell)

image

And here is where I sadley tell you that we were so excited about eating them and the holidays that I completely forgot to take a final picture! If this description will do any justice:

“As we opened the oven, we pull the hot pan from its shelf, letting the mouth watering scent of mozarella and basil fill our noses. On the pan sat perfectly crisp shells with pleated edges filled with a steaming mixture of basil pesto, tomatoes and mozarella cheeses. As we set the heated pan on the stove to cool, we inhale the decadent aroma of the appetizer. Before we know it, we’ve each grabbed a burning hot shell. With smiles on our faces, we each take a bite. The crisp, paper like shell, crunches into multiple layers our mouth. The mixture lightly burns our mouths, but we don’t care. The soft texture of the mixture combines with the irrestistable crunch of the shell leaving our mouths in complete bliss.”

Yes, they were that good. (And all my relatives thought so too!)

Grade: Cost: Time:

A+

~$5-$10 (We had some of the ingredients, but this isn’t pricey and makes a good amount

20 Prep
10 Minutes to Cook

Level of Difficulty:
Easy
What I Would Change:
Could try with biscuit dough, but I enjoyed the lighter fillo shells more.
Overall Impression:
A hit! Everyone loved them! And they’re vegetarian friendly.

Grilled Bruschetta Chicken

All winter I’ve been waiting for grilling season to start. Mostly because of a pin I found for Grilled Bruschetta Chicken. I love Bruschetta and thought this sounded like a fantastic way to turn an appetizer into a healthy meal.

For you non cooks, this recipe is extremely simple. The hardest part for us was figuring out how to turn on the new grill. (My Dad has been the only one to use it yet, and he wasn’t home to help)

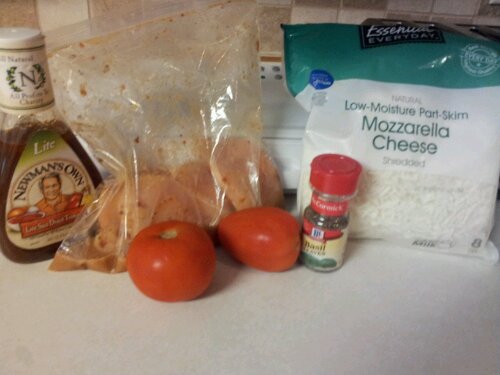
Ingredients
4 small boneless skinless chicken breast halves
1/2 cup KRAFT Sun-Dried Tomato dressing, divided (We couldn’t find Kraft so we opted for Newman’s Own Sun Dried Tomato Dressing)
2 tomatoes, finely chopped
1/2 cup shredded part-skim mozzarella cheese
1/4 cup chopped fresh basil or 1 tsp. dried basil leaves (I used dried basil)

image

Here are the instructions from the pin.
Instructions

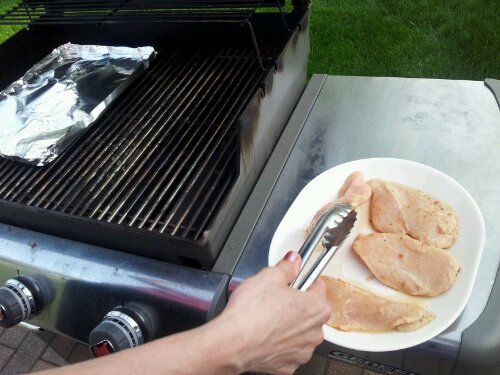
  1. Place a large sheet of heavy-duty foil over half of grill grate; heat grill to medium heat. Meanwhile, place chicken in resealable plastic bag. Add 1/4 cup dressing and seal bag. Turn bag over several times to evenly coat chicken with dressing. Refrigerate 10 minutes (I marinate it all day if I remember in time). Remove chicken from bag; discard bag and dressing.
  2. image
    image

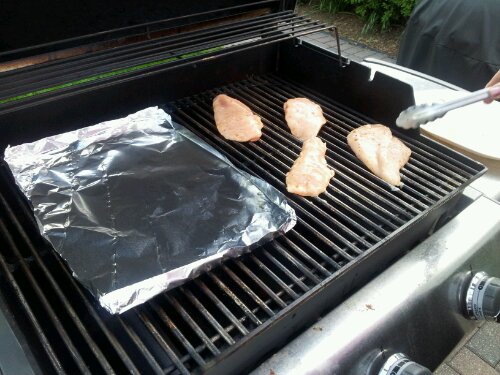
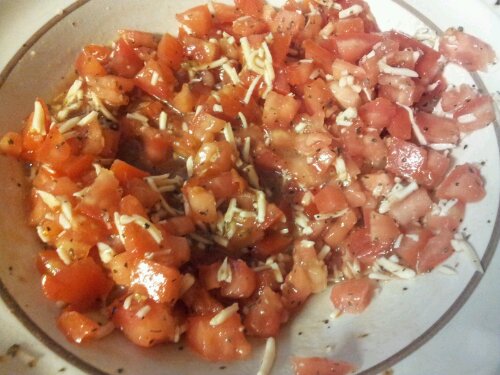
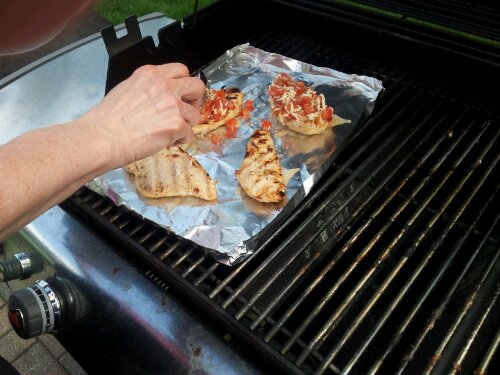
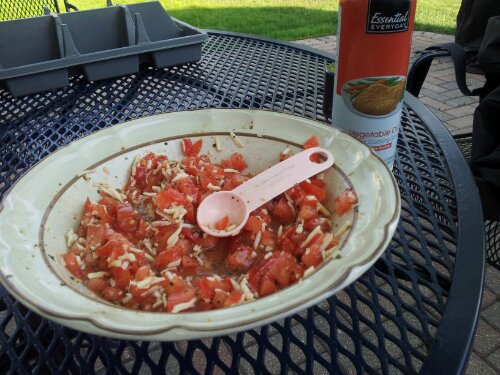
  3. Grill chicken on uncovered side of grill for about 6 minutes. Meanwhile, combine remaining 1/4 dressing, tomatoes, cheese and basil.
  4. image

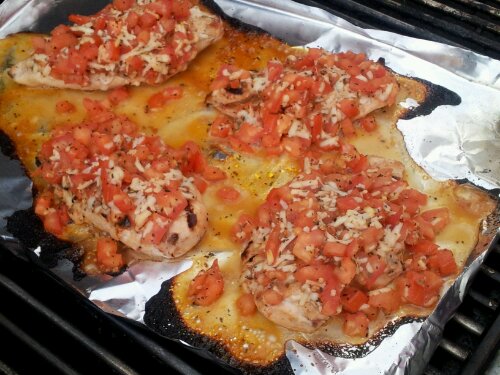
  5. Turn the chicken over and place cooked-side up, on foil on the grill. Top with tomato mixture. Close lid. Grill 8 minutes or until chicken is done.
  6. image

    image

  7. *Sometimes we add a splash of balsalmic vinegar to give it a bit more zip.


What I did/my tips:
While I was at work, we left the chicken soaking in the dressing. This was a great idea! The chicken soaked up the dressing which made the chicken moist and carried through the bruschetta flavor from on top.

I highly recommend dicing the tomatoes before you start grilling. It doesn’t hurt to be prepared. Plus, you’ll have everything right by your grill so you don’t need to run in and out of your house. For the tomato mixture, make sure you only use the specified amount of dressing. It may seem thick at first, but the tomatoes have juice in them that will make it runny.

image

We added a side dish of rice. I would recommend some sort of side dish with this.

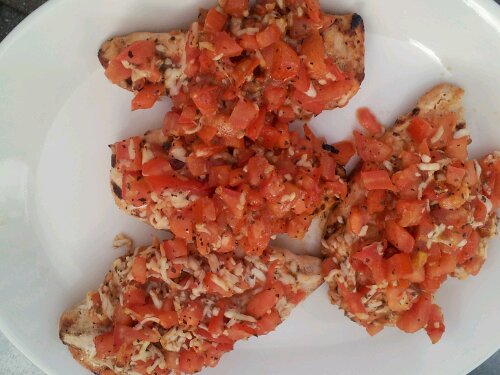
Final result:
image

image

Grade: Cost: Time:

A

$10-15 (Depends if you use fresh basil)

Active: 15 minutes (add a few minutes for prep)

Level of Difficulty:
Easy if you can work a grill.
What I Would Change:
I would love to try with fresh basil. We just used what was on hand. We also added a little balsamic vinegar and balsamic glaze (we tested both on parts of the chicken)

Overall Impression: This recipe was very simple, healthy and easy to make. We will definitely be making this again.


If you’re also a bruschetta fan, check out my Mozzarella, Basil and Tomato Empanadas

Open Faced Empanadas with Tomato, Basil, and Mozarella

Ever since I pinned these, I have been dying to make them! They look like the perfect appetizer for any party or event.

You will need:
12 empanada shells (I couldn’t find these, so I used 30 pre-made phyllo shells)
3 small tomatoes, chopped (I used 2 Roma tomatoes instead of three)
6 oz. mozzarella cheese, diced (Use fresh mozarella, not shredded)
10 basil leaves, chiffonade [thinly sliced]
kosher salt and freshly ground black pepper to taste
Parchment Paper
Baking Pan

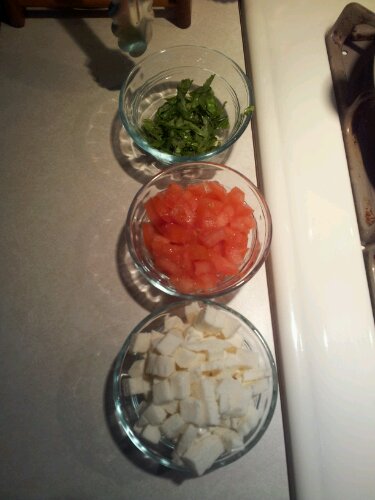
First I chopped up the tomatoes, mozzarella, and basil leaves and separated them into different bowls.
image

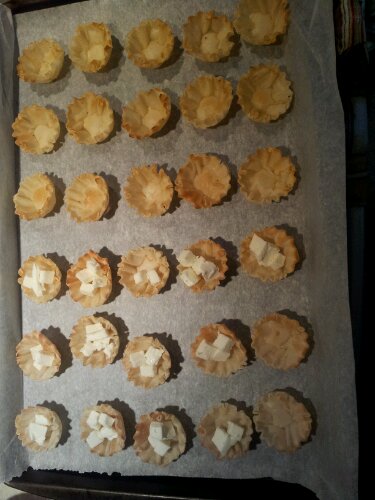
Next, I covered a baking pan with parchment paper and put the empanada/phyllo shells on it. (You don’t need to spray the pan or the paper, because the parchment paper will protect it.)  I then covered the shells in a layer of mozzarella. I wasn’t shy with mozzarella because I knew it would melt (and I am also a HUGE fan of cheese).
image

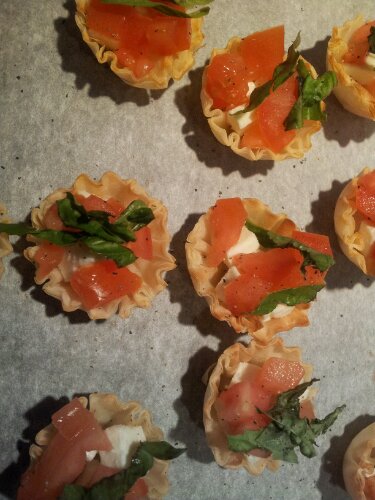
Next I covered them with a layer of tomatoes and the basil leaves.

image

Finally, I covered them with another layer of mozzarella, and stuck them in the oven at 425 for 10 minutes. The recipe called for 15 minutes, but I didn’t want to risk burning the empanadas (since my shells already came pre-cooked). After checking on it after 10 minutes, I put it in for another 4, checking it after every 2 minutes, just in case.

Here is the final result after cooking:
image

I let them cool for 5 minutes to harden up, then called my family in to share them. The result: FANTASTIC! All four of us absolutely loved them. They were there one minute and then gone the next. To enhance the flavor, we added some balsamic glaze, but they were excellent with or without the glaze.

Here is a picture with the glaze.
image

Grade: Cost: Time:

A+

Around $10

Prep: 5 Minutes
Cook: 15 Minutes

Level of Difficulty:
 Easy
What I Would Change:
Nothing. A balsamic glaze enhances the flavor, but they are excellent with or without it.
Overall Impression:
Excellent! My new favorite appetizer recipe. They taste very similar to a bruschetta,
but the cup shape keeps all the ingredients contained, so it doesn’t make a mess.

Slow-Cooker Sunday: Tomato Basil Parmesan Soup

Welcome to our first Slow-Cooker Sunday! Today I’ll be sharing with you this recipe that I’ve been dying to try since I pinned it. Since I received not one but 2 kinds of slow cookers for Christmas, I thought it was high time I got started. I gathered up my ingredients and decided to throw in some extra tomatoes I already had on hand because I didn’t want them to go bad. (Keeping it real here, guys).

image

The instructions were really clear so I had no trouble getting the soup together even though I’ve never made a roux before! I love slow-cooker recipes because they are just leave-them-then-love-them easy.  Like the instructions said, I let the veggies, stock and spices mingle for a few hours and made the roux half an hour before dinner. This is what I ended up with:

image

I was a little nervous for the taste test because I have absolutely no experience making soups and I love tomato soup. I had high expectations! So let me cut to the chase, I loved it! It was creamy, and had great texture thanks to the veggies. It is definitely a step up from canned tomato soup, and thanks to the slow cooker it didn’t really take up much of my time to prepare.  I also thought my love for tomatoes made me biased so I asked my boyfriend (who hates tomatoes) and my sister (who is so/so on tomatoes) to give it a shot and they both liked it. I could see it going well with panini on a cold day as a grown up way to relive those grilled cheese and tomato soup days I had as a kid, but for now I’ll just pack it for lunch!

image 

Grade:   Cost:   Time:    

B+

$5

Active: 10 minutes

Total: 6-7 hours


Level of Difficulty:  
This was very easy to accomplish. Good for a fearless beginner.  
 
What I Would Change:  
 I added diced tomatoes I already had and it added a nice texture.  
 
Overall Impression:  
 I really enjoyed the soup, but the roux seemed a little intimidating for someone who had never done it.