Tag Archives: recipe

Slow Cooker Chicken Tortilla Soup

The Pros and Cons of Making Foods

Food. I love food. I plan my entire day around eating. The other day I woke up and the first words I said were “I’m going to make ____ for dinner”. My boyfriend rolled over and replied “You JUST woke up and you’re already thinking about dinner?? Really?” Yes. Really. Thinking about food is what gets me through the day.

There’s just one thing about food…making it.

When I get home from work the LAST thing I want to make is dinner. It doesn’t matter how simple it is. There are many days that it’s just NOT happening. I wish there were a food fairy who would magically bring me delicious food. Turns out she does exist. Her name is grubhub and her fees aren’t cheap. Oh and she’s also a he.

Grubhub Fairy GodfatherFor awhile i was doing really good at making meals in advance. I’d double a batch and freeze half for those really lazy days. Then my boyfriend and I would be too lazy to prepare a lunch for the next day. Then that second meal became lunch and leftovers were gone.

Slow cooker recipes are becoming my favorite to prepare. Most of them are so easy. I was going to have the apartment to myself last weekend and was presented with two options:

1. Set up a slow cooker recipe to cook all day. Instant food! (and probably healthy).

2. Overpay for someone to deliver food to you (most likely pizza and very unhealthy)

12:30 rolls around and it’s time to decide. If I set up the food then, it’d be done perfectly in time for dinner. I got up out of my favorite seat (our recliner) and went into the kitchen to whip up this Slow Cooker Tortilla Soup. Oh, did I also mention that it was only in the 40’s… in the middle of May. I blame it on the release of the new Avengers movie. Tony Stark… Eddark Stark… Winter is coming blah blah. Bring on the fantastic four and the torch man. We need that summer heat!

Back to the recipe. It was really easy to make. Luckily I had everything already. I substituted the regular diced tomatoes with diced tomatoes with green chiles. I was really surprised that there was no call for jalapeños or serranos or SOME spice in this soup. I always associate tortilla soup with spice. There was none in this one.

This tortilla soup also called for beans. This is something I also wasn’t used to, but hey, something new. That’s what this blog is about. Trying new things.

Slow Cooker Chicken Tortilla Soup

An easy to make slow cooker recipe. This recipe doesn’t use peppers. Enjoyable for all ages.

I have to admit I was surprised that I enjoyed this soup so much. It tasted less like traditional tortilla soup and more like a burrito in soup form. I would make it again as an alternate to my usual tortilla soup recipe. The black beans were a nice touch, but I missed the spice. Maybe next time I’d throw in a jalapeno or two.

Grade: Cost: Time:
A Could cost you up to $15, depending on what you do and don’t have. This makes a large batch. 6 Hours on low
Level of Difficulty:
Easy
What I Would Change:
Add some jalapenos. There was no spice in this. While it was good on it’s own, I missed the spice.
Overall Impression:
Good. i’m glad I tried it. I wish I saved the other half to freeze. I’d make this again. It’s not spicy so even your grandmother should like it.

Honey Balsamic Chicken Tenders

My cooking lately has been in a rut. I feel like we’ve been making the same meals every week. I needed something new. I had a side dish in mind, but no main dish. I looked for something that would be complimentary and found this honey balsamic chicken tenders recipe.

Here’s the recipe (from BudgetBytes)

  • 2 medium (1.5 lbs) chicken breasts $2.99
  • ¼ cup balsamic vinegar $0.80
  • 1 clove garlic $0.08
  • 2 Tbsp olive oil (divided) $0.24
  • to taste salt & pepper $0.05
  • 1 Tbsp butter $0.10
  • 2 Tbsp balsamic vinegar $0.40
  • 3 Tbsp honey $0.33

Directions

  1. Slice the chicken breasts on a diagonal into six strips each. Place the strips in a quart sized zip top bag along with ¼ cup of balsamic vinegar, one clove of garlic (minced), 1 Tbsp of olive oil, and a pinch of salt and pepper. Mix the ingredients in the bag and let marinate in the refrigerator for at least 30 minutes.

    Marinate the chicken for the honey balsamic chicken tenders recipe.

    Marinate the chicken for at least 30 minutes.

  2. When you’re ready to cook, heat the second tablespoon of olive oil in a large skillet over medium heat. When the oil is hot, cook the strips until browned on both sides (about 2-3 minutes each side). You may have to do two batches. Place the cooked chicken on a clean plate.

    Cooking chicken for honey balsamic chicken recipe.

    Cook chicken thoroughly

  3. Turn the heat down on the skillet to medium-low and add the butter and last 2 tablespoons of balsamic vinegar to the skillet. Use a spoon to stir the mixture and dissolve the sticky bits off of the bottom of the skillet. Once the mixture has dissolved together, add the honey, increase the heat, and allow the sauce to simmer until thickened (about five minutes).

    Creating the sauce for the Honey Balsamic Chicken Tenders

    Letting the sauce simmer

  4. Once the sauce has thickened, season to taste with salt and pepper (I just used a pinch of each). Add the chicken back to the skillet and toss to coat in the warm balsamic sauce. Serve immediately.

    Honey balsamic chicken with glaze.

    Finished honey balsamic chicken with glaze on top.

Review
The smell! Oh wow, open your windows when you cook this one. The smell was terrible. My boyfriend purposefully stayed in the other room because of it. I was quickly losing confidence in the recipe. How could something that smells that bad be good? Well, stick it out folks because this is a good one. The flavor of the chicken was rich and moist. The sauce was a nice glaze with a kick of sweetness. I was pleasantly surprised and so was my boyfriend. We ate up the entire recipe, and I regretted not making more. I would have loved some more for lunch the next day. I think the chicken would taste excellent on a salad.

Grade: Cost: Time:
A+ around $6.
I had everything.
Plan about an hour. Marinate for 30 minutes, then cooking is anywhere from 15-25 minutes.
Level of Difficulty:
Easy
What I Would Change:
Open a window or turn on a fan. The vinegar smell is nasty, but the end result is great.
Overall Impression:
I’d love to try this and use the pieces on a salad. I think it would be delicious. The smell was really a turn off, but the end recipe was a nice mix of the tart balsamic and the sweet honey. I wanted something different and this proved to be a good choice.

Homemade Spaetzle

Sunday was NOT my day… I woke up with a bad headache, my back hurt and my fridge defrosted overnight. Not only did I lose $20 worth of brand new yogurt, but my ice packs were practically useless as well. There was also an ever expanding puddle on my floor from the melting ice. We fixed the fridge, but my day was ruined. Those wonderful plans of getting up early, working out, eating healthy were gone. Gone like my yogurt.

After cleaning up the water and getting the fridge going again, I had to spend my Sunday morning at the food store. Since I was already in a rotten mood, and it was -1 without even factoring in the wind chill I wanted to GOOD MEAL. The first and only thing that came to mind was Chicken Paprikas. Never heard of it? It’s a Hungarian dish and my absolute favorite. It’s usually served with Nokedli, more commonly known as spaetzle.

I don’t have my grandma’s recipe so I turned to Pinterest for both the spaetzle and chicken paprikas recipe. Today I’m going to let you in on the spaetzle recipe. I did not use the paprikas recipe attached to this one. The one my grandma would make would sit in a put until the meat started to fall off the bone. This one didn’t seem right. The spaetzle recipe did.

Ingredients:

  • 2 ½ cups all-purpose flour
  • 1 teaspoon salt
  • 2 eggs
  • ¾ cups water
  • 1 tablespooon butter, melted

Instructions:

Originally from American Heritage

  1. I suggest you make the spaetlze while your chicken is simmering in the broth. I made mine too early and they sat around for way too long.
  2. Bring a large pot of water to a boil.
  3. Whisk together flour and salt in a medium bowl. Make a well in the middle and add the eggs, water and butter.
  4. Stir until the batter is smooth and thick.
  5. Drop batter (each dollop about a teaspoon) into boiling water with a spoon; dipping the spoon into the water each time. This will keep your spoon clean and make the whole process less painful. [You can make these larger or smaller to your taste]
  6. Cook only half the dough at a time to avoid over crowding. Stir the bottom of the pot with a wooden spoon, so that the dumplings will rise to the top. After the dumplings rise to the top, let them boil about 2 minutes more.
  7. Remove to a large colander and drain while you repeat the process with the second half of the batter.

My Experience:

  • The spoon took too long. I coated my cutting baord and hands with flour. I rolled the dough into small snake-like pieces and began ripping and throwing pieces into the boiling water. It was fun. Plus it gave it that great “chewing gum” look that it’s supposed to have.
  • I used more flour than I should have. My spaetzle was pretty heavy. It should be pretty light. I might not have let them cook long enough. We’ll see after I eat my leftovers today.
  • The smaller the pieces the better. They cook faster and they’re easier to eat.
Making the dough for spaetzle or nokedli.

Making the dough. I added a little extra flour on top so my hands didn’t stick as I mixed it.


cooking spaetzle.

The dough will begin to rise to the top of the water when it’s done cooking.


Grade: Cost: Time:
B+ Free 20 minutes
Level of Difficulty:
Medium
What I Would Change:
Less flour and cook longer. I put flour on my hands as I ripped my pieces apart. I think this is what made the pieces heavier than I remember.
Overall Impression:
I need to make a few slight modifications (mainly beginners errors). Otherwise this is a fairly simple recipe. It does take awhile to make. This process is great to have two people for. I would throw the pieces in the water and I had my boyfriend scoop them out for me.

Greek Yogurt Banana Bread

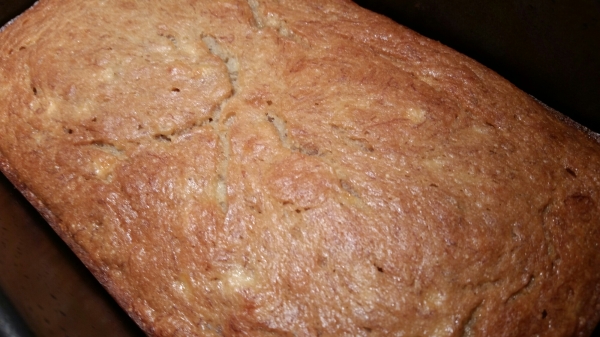
There was a sale last week on bananas at our local grocery store. I bought more than usual because we’re always running out. Bananas are our go to food before working out, in place of breakfast, and for general snacking. I thought “a few more couldn’t hurt”. Then I remembered that half my family was going on a vacation so those bananas were just going to sit. I had a whole bunch (6 to be exact) that were going bad.

About a week or so prior I was looking for different bread recipes to use up some greek yogurt I had. That was set to go bad in another week so I was coming under a time crunch. Expiring greek yogurt…rotting bananas….  It was like the stars aligned.

I intended to add the recipe on here, but the original site has a great format for letting you print the recipe out. Check them out here.

I didn’t have the whole wheat graham flour, so I substituted more regular flour in its place. I also excluded the nuts. I brought a loaf in to work and didn’t want to add nuts in case someone was allergic.

image


Grade: Cost: Time:
A Will run you maybe $5-$10. These are basics, so most you should already have Prep: 10 Minutes

Cook: 1 Hour

Cool time: 15 Minutes

Level of Difficulty:
Easy
What I Would Change:
I enjoyed it as it. I did not use the wheat flour. We only had regular.
Overall Impression:
I found that I enjoyed this banana bread more than most other recipies I’ve tried. This bread was moist and the banana flavor was just right. I agree with the original poster of this recipe that you need to use 6 bananas.

Strawberry Poppyseed and Bacon Chopped Salad

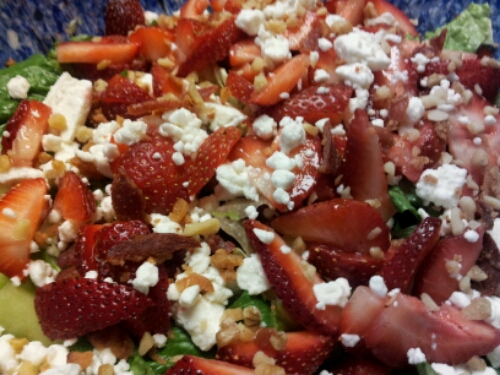
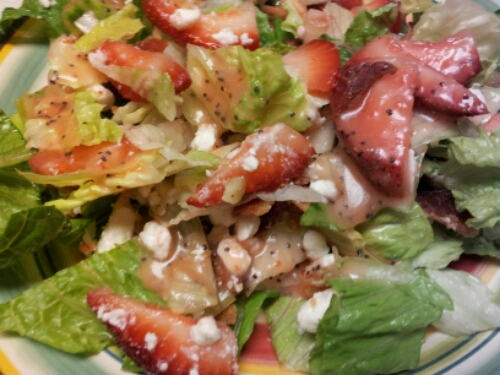
I had a lot of strawberries left over from the greek yogurt strawberry banana bread that I made last week (which in case you didn’t read about it…. do yourself a favor and go read about it. It’s delicious!) Well, anyway… aside from that not being proper grammar, I had almost a full container of strawberries left. Of course that was planned because I also had planned this….. a strawberry poppyseed and bacon chopped salad.

Strawberry Poppyseed and Bacon Chopped Salad tested on Pintertesting.com

I’ve been hooked on salads, specifically chopped salads for the past year or so. The cafe at work makes these salads that are to die for! I’m not proud of this, but their poppyseed dressing is so good that I have even licked the plate to get more of it…. When I saw that this recipe comes with its own poppyseed dressing, I almost jumped through the roof! Hello homemade crack!

The original recipe comes from Cremedelacrumb

Ingredients
  • 6 cups chopped romaine lettuce
  • 2 cups strawberries, chopped
  • 8 strips bacon, cooked and crumbled
  • ½ red onion, diced
  • 1 cup crumbled feta cheese
Dressing
  • 1 teaspoon garlic, minced
  • 1 teaspoon diced red onion
  • ⅓ cup sugar
  • ⅓ cup white vinegar
  • ¼ cup strawberries, chopped
  • ½ cup olive oil
  • ¼ teaspoon salt
  • 1 tablespoons poppyseeds
Instructions
  1. In a large bowl toss together chopped lettuce, strawberries, bacon, and red onion. In a food processor or blender, add all dressing ingredients and pulse 1-2 minutes until smooth. Pour dressing over salad and top with crumbled feta cheese. Enjoy!

image
image

My Comments

This salad was delicious! It will be perfect with a few alterations.

  • Be careful how much bacon you add! Our bacon pieces were tiny so I cooked two extra pieces. It was way too much bacon.
  • Add a little less sugar to the dressing. The dressing was good, but I’d take away maybe a teaspoon, potentially a full tablespoon of sugar from the dressing. With the strawberries it became just a little too sweet.
  • Keep an eye on the red onion. It’s really good balancing out the dressing, but can be a lot very quickly.
  • Add chicken. That would have made it a perfect recipe.
  • Switch out the bacon for some walnuts.
  • Change out the fruit. I think the dressing would taste just as good on apples as it did on the strawberries.
Grade: Cost: Time:
A- A lot of basics, but can get pricey. Estimated = $10-$20 for ingredients. 15 Minutes
Level of Difficulty:
Easy
What I Would Change:
See “My comments” for extensive list. In summary: add chicken, add nuts, limit bacon and onion. Limit sugar in dressing or use another sweetener.
Overall Impression:
A really really good salad, but needed some individual tweaking. Add chicken and less bacon and it could be A+ as is. I’ll be using this dressing again for sure.

Parmesean Basil Orzo

Today I bring you… a little bite of heaven. Otherwise known as Parmesean Basil Orzo. I’ve had a taste for orzo recently and convinced my parents to pair it with a whole grilled chicken. The original recipe comes from Plain Chicken.

Basil Parmesean Orzo Recipe tested on Pintertesting.com

Parmesan Basil Orzo
serves 6-8
2 Tbsp butter
1 1/2 cups orzo
3 cups chicken broth
1/2 tsp garlic powder
3/4 cup grated parmesan cheese (yes the stuff you usually add to pasta or pizza)
2 Tbsp chopped fresh basil
salt
pepper

  1. In a large skillet, combine butter and orzo.  Sauté over medium heat until orzo is golden brown, stirring frequently.
  2. Slowly stir in the broth and garlic powder and bring to a boil.
  3. Cover and reduce heat to low.  Simmer 20 minutes or until orzo is tender and almost all the broth has been absorbed.
  4. Remove from the heat, stir in the basil and Parmesan and salt and pepper to taste.

Serve hot.

——————————————————————————-

Some of the lights in my kitchen have burnt out so the lighting is even worse than usual. It looks and tastes similar to a mac and cheese, but not nearly as cheesy. It’s both light an delicious and a perfect side. My family loved this. This recipe is supposed to serve 6-8 and 4 of us devoured it all.

Basil Parmesean Orzo Recipe on Pintertesting.cm

Grade: Cost: Time:
Our Average: A+ Free. I had everything. Growing my own basil finally came in handy! ~22 Minutes
Level of Difficulty:
Easy
What I Would Change:
Serve warm and right away. Our chicken wasn’t quite done so I needed to reheat it. To do that I added more chicken broth so it didn’t get clumpy.
Overall Impression:
YUM!! We’ll be making this a lot this summer. It’s got just the right about of cheesy flavor but the orzo is still light enough to make a perfect summer side dish.

Avocado and Greek Yogurt Chicken Salad

I have had such a taste for Chicken Salad lately. I’m not sure why considering I’ve only ever had it once. I pinned this Avocado and Greek Yogurt Chicken Salad the other day. It combined two of my favorite loves: Avocados and Greek Yogurt so it was bound to be good. I just hoped that it would satisfy my chicken salad craving. The original pin has the recipe included but I would recommend visiting the original site for the full recipe.

Avocado and Greek Yogurt Chicken Salad tested on Pintertesting.com

Ingredients

  • 1 ripe avocado, removed from skin
  • ½ cup plain Greek yogurt
  • ½ teaspoon garlic granulated garlic
  • ½ teaspoon onion powder
  • ¼ teaspoon salt
  • ¼ ground pepper
  • 2 cups chopped or shredded cooked chicken
  • ½ red onion, chopped
  • 1 small lime

Directions

  1. In a medium bowl mash together avocado and greek yogurt until smooth.
  2. Stir in garlic, onion powder, salt, and pepper.
  3. Add chicken and red onion to avocado mixture and stir until all ingredients are combined.
  4. Squeeze in half the juice from the lime. Give it a taste, squeeze in the rest of the lime if needed. I used all of the lime juice.
  5. Serve in a wrap, in a pita, or anyway you typically enjoy chicken salad.

My comments:

  • Add the onions at the end. I added it with the chicken and added WAY to much! It was overpowering. My family got intense heartburn and bad breath. The mix tasted great without the onion. I wish I kept it that way.
  • We added more spice to it. Celery Salt was the best addition.
  • I served mine on cucumber slices. I thought it would be a great way to keep the carbs down. This was ok, but I think hindered the flavor.

image

Grade: Cost: Time:
Our Average: B+Future potential: A+ I needed to buy the avocados, Greek yogurt and cucumbers. This shouldn’t cost much if you have the basics and you can buy these ingredients in bulk to use in other recipes. Prep: 20 – 30 Minutes (Including Chicken Cooking)
Level of Difficulty:
Easy
What I Would Change:
Keep the onion until the end. See if you like the chicken salad without the onions better. I know I would have. It also looks like the original recipe author cucumbers to their wrap (and maybe even tomato?). That may enhance the flavor.
Overall Impression:
My mom, sister and I all felt the onions were overpowering. We could only eat a few before we made something else. My dad scraped his off the cucumber (He had the leftovers the next day). He put his on a wrap and added a little celery salt and said it was perfect. I think the cucumbers negatively affected the recipe for us. We will for sure make this again, but tweak the onion and the spices. The Greek Yogurt and the avocado is a great change from the typical mayo chicken salads.

Banana Cream Pudding Cookies

Last weekend I had a MAJOR sweet tooth. It was a long weekend so I decided to spend my extra day baking. Baking on a day off? Was I crazy? Maybe just a little bit but food cravings will make a person do anything. I decided I would go all out on this one and make some cookies. I knew they’d be easy to get rid of at work the next day, but I’d still get my food craving. I picked a banana cream pudding cookies recipe because well it just sounded incredible. (Plus I like to fool myself that a banana cookie is like eating a banana and therefore healthy. One can dream right??).

Before I started I made sure to read the comments. I learned that the directions were not entirely complete. Rather than chance it I googled similar recipes and pieced together the missing instructions.

Ingredients:

1 cup unsalted butter, at room temperature (this is VERY important)
3/4 cup brown sugar
1/4 cup granulated sugar
1 (3.4 oz) package banana cream instant pudding mix (no, you don’t need to make the pudding, just add the powder)
2 large eggs
1 teaspoon vanilla extract
2 1/2 cups all-purpose flour
1 teaspoon baking soda
1/2 teaspoon salt
2 cups white chocolate chips

Directions:

1. Preheat oven to 350 degrees F. Line a baking sheet with parchment paper or a Silpat baking mat and set aside.

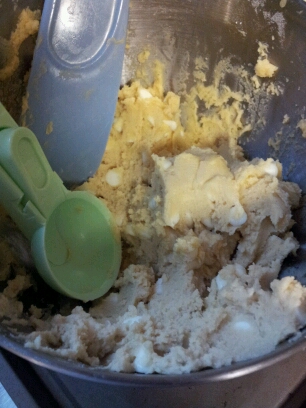
2. Using a mixer, beat together butter and sugars until creamy. Add in eggs, and vanilla extract. In a medium bowl, whisk together the flour, pudding mix, baking soda, and salt. Add the dry ingredients to the wet ingredients and mix until just combined. Stir in the white chocolate chips.

image

3. Drop cookie dough by rounded tablespoons onto prepared baking sheet. I used an ice cream scooper. Bake for 10 minutes, or until slightly golden around the edges and set. Remove cookies from oven and let cool on baking sheet for two minutes. Transfer to a cooling rack and cool completely.
image

DISCLAIMER I was too busy eating these to remember I needed to take a picture. Sorry!

Grade: Cost: Time:
A+ <$5 (I had all the basics. Just needed the pudding) Prep: 10 minutes
Active: 10 Minutes
Level of Difficulty:
Easy
What I Would Change:
  1. I forgot to soften my butter before starting. I tried to speed the softening, but it still wasn’t ready in time for baking. This affected my cookies and made them more biscuit like.
  2. Use less white chocolate chips.
  3. I’d like to make these with Reeses pieces instead of white chocolate.
Overall Impression:
YUM!! If you like banana and white chocolate you’ll love this. I brought most of the batch into work and they were almost all gone before lunch. I’d call this a success!

Homemade Cheddar Bay Biscuits

Are you a fan of our Facebook page? Last night I posted a teaser about eating a little piece of heaven. Here’s where I tell you what that really is…. Cheddar Bay Biscuits!! In other words, those delicious pieces of bread that you get at Red Lobster.

I had pinned another recipe originally, but after reading the comments, decided to search around Pinterest for a different one. The first recipe used bisquick which many people commented was too dense. The one I decided to try uses all purpose flour and cake flour.

Here is the original recipe :

Scratch Cheddar Bay Biscuits
Makes 16 biscuits 

1 1/2 cups (7 1/2 ounces) all-purpose flour
1 1/2 cups (6 ounces) cake flour
1 tablespoon baking powder
1/2 teaspoon baking soda
1 teaspoon salt
2 teaspoons garlic powder
12 tablespoons (1 1/2 sticks) unsalted butter, softened and cut into 1/2-inch pieces
2 cups shredded cheddar cheese (about 4 1/2 oz)
1 1/2 cups buttermilk

Garlic Topping (I’ve read that the Old Bay seasoning by Mccormick is what Red Lobster uses, but that’s a special order item at my grocery store)
4 tablespoons (1/2 stick) salted butter
2 cloves garlic, finely minced or through garlic press
1/2 teaspoon garlic powder
1 teaspoon dried parsley

Directions

1. Adjust oven rack to the upper-middle position, and preheat oven to 425 degrees. Line 2 baking sheets with parchment or a Silpat.

2. In a large bowl, whisk both flours, baking powder, baking soda, salt, and garlic powder until combined. Add in the cubed butter and using your fingers, rub it into the flour mixture until it resembles coarse meal. Add in the shredded cheese and mix to combine. Add in the buttermilk and mix until combined.

3. Using a 1/4 measuring spoon, scoop the biscuit mixture onto the prepared baking sheets. Bake the biscuits for 10 minutes, and them remove and brush with butter mixture, and then bake for an additional 5 minutes until the tops are puffed and golden brown. Allow biscuits to cool on baking sheet for 5 minutes then transfer to a wire rack. Serve at room temperature or while slightly warm.

Butter Topping

1. In a small saucepan, combine butter and minced garlic, heat on medium heat until the butter is melted and garlic is fragrant about  1 to 2 minutes. Add in the garlic powder and dried parsley, and stir to combine. Set aside.

Storage: Can be stored at room temperature in an airtight container for up to 2 days.
image

Grade: Cost: Time:
A+++++++++++

(What’s higher than an A+?

Free for me. Most items should be basics.

5-10 Minute Prep

15 Minutes cook

Level of Difficulty:
Easy/Medium
What I Would Change:
Nothing
Overall Impression:
Hands down the best recipe I’ve found. Treat yourself with these. Just do it! (And don’t feel guilty, I ate 5…. and it was well worth it!)

Pizza Hut Breadsticks Copycat Recipe

One of my favorite childhood memories is going to Pizza Hut with my family to order our individual pizzas and, of course, an order of breadsticks! That Pizza Hut has since closed, but I still hold the memory of those breadsticks on a golden pedestal. Theoretically I could find another Pizza Hut and order breadsticks from there, but I don’t want them from another Pizza hut. I want THOSE breasticks. I want that entire memory back.

Since that cannot happen, I decided to team up with my mom to tackle a copycat recipe. Good or bad, I would be able to make a new memory with my mom.

Ingredients (From Original Recipe)
 
                 
1 1/2 cups hot water
2 TB sugar
1/2 tsp salt
1/2 cup non-fat dry milk
1 TB yeast
3 cups flour
1 tablespoon ground oregano (Seasoning)
1 tablespoon onion salt (Seasoning)
3 tablespoons garlic powder (Seasoning)
 
4 tablespoons dry Parmesan cheese (Seasoning)

 Instructions can be found here.

  Before you click the link, let me prepare you…. These instructions suck! Ok, they are not the worst that I’ve found, but it calls for invisible butter and calls for all the seasoning to go on top. Shouldn’t some of them go in the mix? It was like eating Little Caeser’s Crazybread with crazy spices on top.

Spices needed for Pizza Hut Breadsticks

Spices needed for Pizza Hut Breadsticks

Mixing the spices together for the Pizza Hut Copycat recipe

Mixing the spices together.

Mixing up the batter to make the dough for the Pizza Hut copycat breadsticks

Mixing up the dough for the breadsticks

Spreading seasoning on breadsticks

Spread the seasonings on the breadsticks (we used about 1/2. Even that seemed WAY to much. I really think much of the spice should be IN the breadsticks)

Cooked Homemade Pizza Hut Breadsticks

Cooked Breadsticks.

Grade:   Cost:   Time:    
B

We had everything. Spices could make it pricey

45 Min – 1 hour


Level of Difficulty:  
Easy  
 
What I Would Change:  
Add some of the spices to the bread mix (though I enjoyed the taste of just the bread). Add a butter wash to the top of the bread. Soak it! There wasn’t enough for my spices to grab on to.  
 
Overall Impression:  
They were alright…. I wasn’t impressed. I liked the taste of the breadstick, but they didn’t rise enough, and the spices were overpowering. I’d rather just find a Pizza hut and order the breadsticks.